Parameters
Another important aspect of build automation is the ability of passing input values to your build. These input values can be anything from generic texts, numeric and enum values, file and directory paths, arrays of aforementioned, boolean flags, or secrets. NUKE comes with a succinct way to declare parameters and lets you set their values in various ways.
You can declare a parameter by adding the Parameter attribute to a field or property:
[Parameter("Description")]
readonly string MyParameter;
You can set default values for parameters as you would normally do through field and property initializers. You can also use static build base properties like IsLocalBuild or IsServerBuild for environmental adjustments:
[Parameters]
readonly Configuration Configuration = IsServerBuild
    ? Configuration.Release
    : Configuration.Debug;
Following best practices, you should mark all your parameters as readonly.
Passing Parameter Values
Parameters are resolved through different mechanisms, each supporting a different automation use-case. These mechanisms are explained in the following sections by their resolution priority.
Passing Values through the Command-Line
In the most straightforward way, you can pass parameter values from the command-line through their kebab-case names prefixed with a double-dash:
nuke --my-parameter <value>
With the global tool installed and shell completion configured, you can pass parameters much faster and avoid any typos.
Passing Values through Parameter Files
Instead of providing default values in your Build class or repeatedly specifying them through the command-line, you can also define them in so-called parameter files (JSON). These files are located under the .nuke directory:
{
    "$schema": "./build.schema.json",
    "MyParameter": "value"
}
Besides the default parameters.json file, you can create additional profiles following the parameters.<name>.json naming pattern. These profiles can be loaded on-demand
nuke --profile <name> [other-profiles...]
Profiles are applied in the order they are passed, whereas the default parameters file comes first.
Based on the build.schema.json file, you can easily configure your parameters inside your IDE using schema-completion:

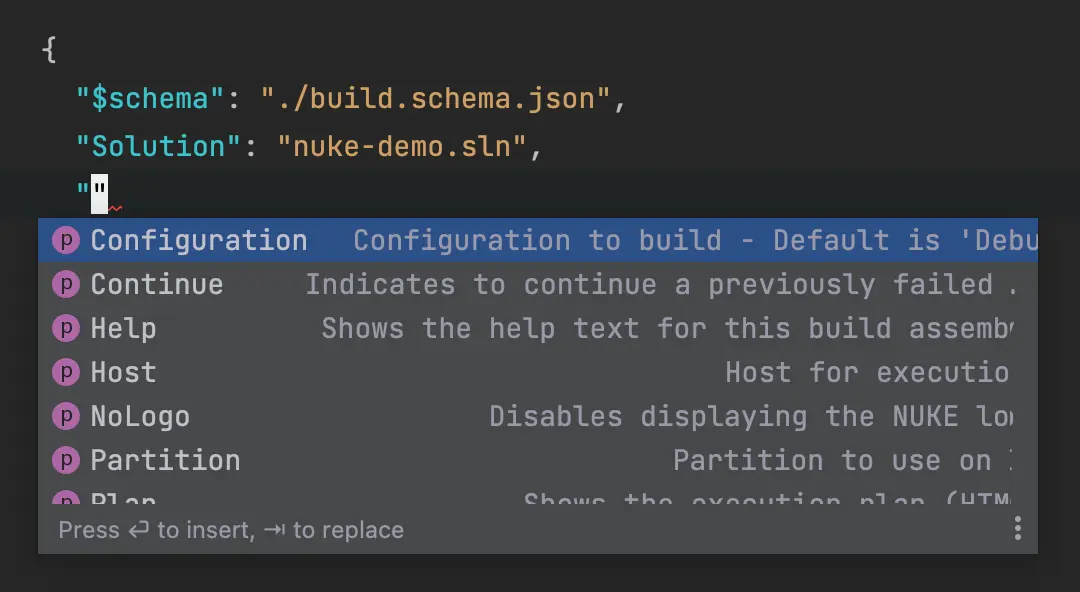
Remember, that the build.schema.json file must be regenerated whenever you add or change a parameter. For instance by calling nuke --help.
Passing Values through Environment Variables
You can set parameter values through environment variables, which can be really helpful when setting up global values in CI/CD pipelines. This is done in such a manner that casing and underscores are completely ignored. Also, you can use the NUKE_ prefix to easily distinguish them from others:
SET MY_PARAMETER = <value>
SET NUKE_MY_PARAMETER = <value>
Required Parameters
You can specify a parameter as a target requirement using the following shorthand syntax:
Target Deploy => _ => _
    .Requires(() => ApiKey)
    .Executes(() =>
    {
    });
Using the shorthand syntax allows you to provide the value interactively when the build is executed locally.
Secret Parameters
When parameters are meant to hold secret values like passwords or authentication tokens, you can add the Secret attribute:
[Parameter] [Secret] readonly string NuGetApiKey;
Marking a parameter as a secret allows you to use the secret management through the global tool.
Unlisting Parameters
Just like targets, your parameters will automatically show up in the build help text along with their description. You can opt out from this behavior by setting the List property:
[Parameter(List = false)]
readonly string MyParameter;
Unlisted parameters can be passed as normal and are still available through shell completion.
Supported Types
Parameters support a wide range of primitive and complex types, including their nullable and array counterparts:
[Parameter] readonly string StringValue;
[Parameter] readonly bool BoolValue;
[Parameter] readonly int? IntegerValue;
[Parameter] readonly string[] StringArray;

[Parameter] readonly MSBuildVersion MSBuildVersion;
[Parameter] readonly Configuration Configuration;
[Parameter] readonly AbsolutePath AbsolutePath;

Target Print => _ => _
    .Executes(() =>
    {
        Log.Information("StringValue = {Value}", StringValue);
        Log.Information("BoolValue = {Value}", BoolValue);
        Log.Information("IntegerValue = {Value}", IntegerValue?.ToString() ?? "<null>");
        Log.Information("StringArray = {Value}", StringArray?.JoinComma() ?? "<null>");

        Log.Information("MSBuildVersion = {Value}", MSBuildVersion);
        Log.Information("Configuration = {Value}", Configuration);
        Log.Information("AbsolutePath = {Value}", AbsolutePath);
    });
By default, the whitespace character is used to pass multiple values for an array parameter. You can quote your values to treat them as single elements for the parameters. Additionally, you can provide a custom separator through the attribute (whitespace will still work as a separator):
[Parameter(Separator = '+')]
readonly int[] Numbers;
Custom Types
All the supported types from above use the type converter infrastructure to convert string values to their respective type instances. This works independently of the fact how the parameter is resolved. It's worth noting that also parameter files will be converter to strings internally.
Depending on your use-case, you can choose one of the following approaches to define your custom type that can convert from string values:
- Enumeration Types
- Enumeration Classes
- Custom Types
Enumeration types define a set of named constants with underlying numeric value:
enum CustomType
{
    One,
    Two,
    Three
}
Members of enumeration types automatically show up during shell completion.
Enumeration classes are open for external extension. The Enumeration base class defines equality operators and implicit string conversion:
[TypeConverter(typeof(TypeConverter<Configuration>))]
public class Configuration : Enumeration
{
    public static Configuration Debug = new () { Value = nameof(Debug) };
    public static Configuration Release = new () { Value = nameof(Release) };
}
Members of enumeration classes automatically show up during shell completion.
[TypeConverter(typeof(TypeConverter))]
public class CustomType
{
    public class TypeConverter : System.ComponentModel.TypeConverter
    {
        public override bool CanConvertFrom(ITypeDescriptorContext context, Type sourceType)
        {
            return sourceType == typeof(string) || base.CanConvertFrom(context, sourceType);
        }

        public override object ConvertFrom(ITypeDescriptorContext context, CultureInfo culture, object value)
        {
            if (value is string data)
                return new CustomType(data);

            if (value is null)
                return null;

            return base.ConvertFrom(context, culture, value);
        }
    }

    public CustomType(string data)
    {
        // ...
    }
}